- Published on
Blender Pulsing Ring Tutorial
- Authors

- Name
- Zamderax Jones
- @zamderax
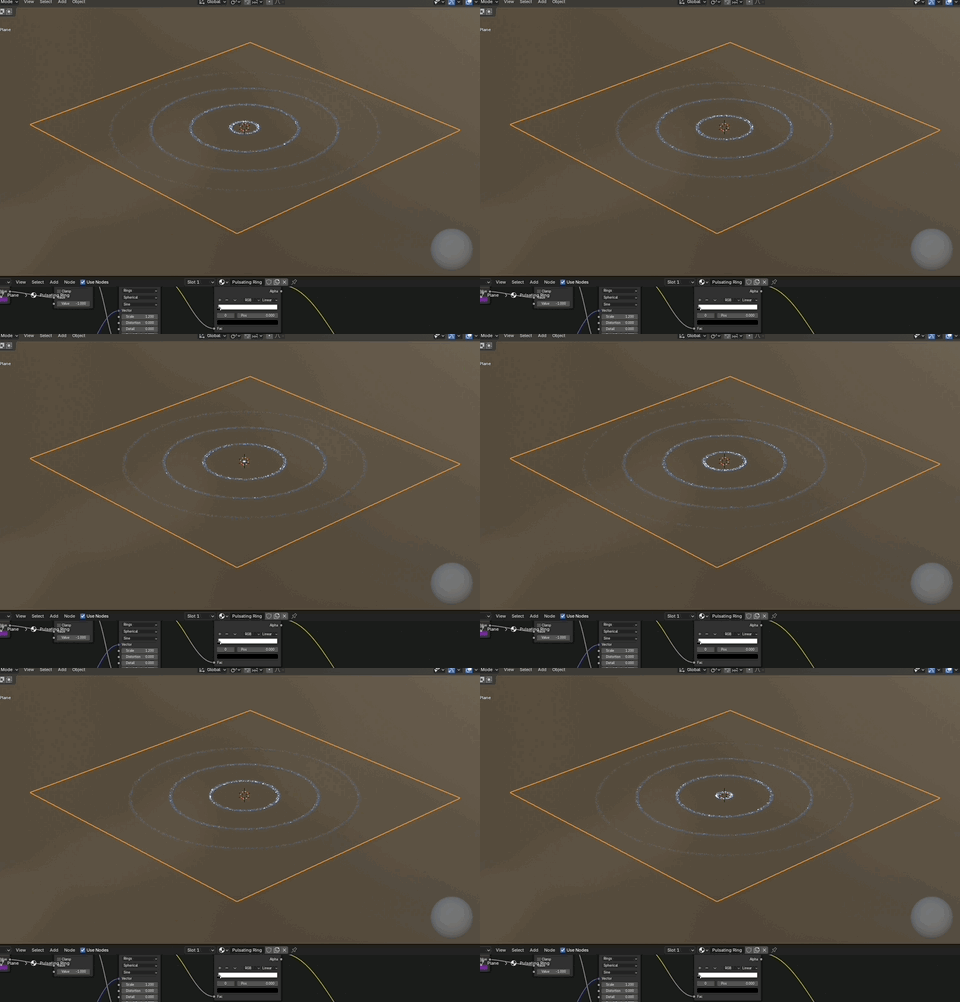
I often have to create a pulsing ring effect in Blender for my projects. This tutorial will show you how to create a pulsing ring effect in Blender. This is what it looks like:

The majority of the work was done here and credit is due to the original author in this YouTube video: Pulsing Ring Tutorial by Plockis.
Here's a link to the final Blender file: Pulsing Ring. It was created in Blender 4.2
Basic Project Setup
- Create a new Blender project
- Delete the default cube
- Add a Plane
- Open up the shading tab
- Add a material to the plane
- In the Shading tab, select the material and let's begin to create the ring texture
The Following Steps Will Create the Ring Material
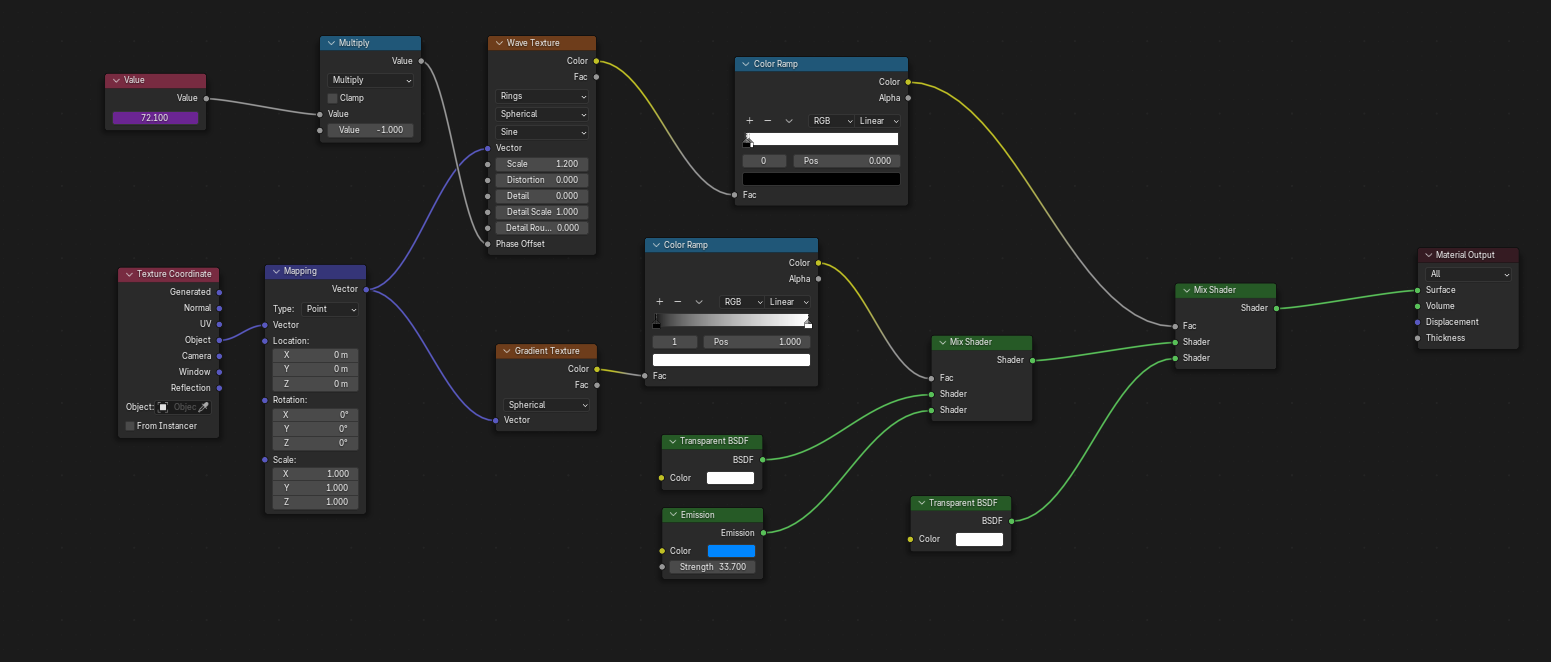
If you want to create a ring texture, you can follow these steps or view a larger image of the material I created (opens in a new tab):

- First create a Texture Coordinate node and a Mapping node
- Connect the Texture Coordinate node's Object to the Mapping node's Vector. Ensure that the Mapping node's type is set to Point.
- Create a Wave Texture node. Set the Wave Type to Rings, Spherical and Sine. Connect the Mapping node's Vector to the Wave Texture node's Vector.
- Create a ColorRamp node. Connect the Wave Texture node's Fac to the ColorRamp node's Fac. Change the ColorRamp 's gradient. Move the white point to position 0.023 and the black point to position 0.
- Create a Mix Shader node. Connect the ColorRamp node's ColorRamp to the Mix Shader node's Fac.
- Create a Gradient Texture node and set it to Spherical. Connnect the mapping node's Vector to the Gradient Texture node's Vector.
- Create another Color Ramp node. Connect the Gradient Texture node's ColorRamp to the second Color Ramp node's Fac.
- Create a Transparent BSDF node and set the color to white.
- Create an Emission node and set the color to Blue (or whatever color you want).
- Connect the Transparent BSDF node to the Mix Shader's first shader input.
- Connect the Emission node to the Mix Shader's second shader input.
- Connect the 2nd Color Ramp node to the Mix Shader's Fac.
- Create anther Mix Shader node and connect the Color Ramp's color to the Mix Shader's second shader input.
- Connect the Transparent BSDF node to the Mix Shader's first shader input.
- Connect the Emission node to the Mix Shader's second shader input.
- Connect the 2nd Mix Shader node to the 1st Mix Shader's first shader input.
- Create another Transparent BSDF node and set the color to white.
- Connect the Transparent BSDF node to the Mix Shader's second shader input.
- Connect the first Mix Shader node to Material Output's Surface shader input.
To animate the ring
- Create a Value Node and set the value to
frame * 0.35. This will create a pulsating effect and move the ring around the plane based off the frame number. - Create a Math Node and set the operation to
Multiply. Connect the Value Node to the Math Node's A input. Set the 2nd Value Node to-1. We want the rings to move outward from the center. - Connect the Math Node's Value output to the Wave Texture node's Phase Offset. This will feed the value to move the offset of the wave texture as the frame number changes.